Supplies:
Acorns
Beeswax
Play-Dough
Small pot
Aluminum can
Step 1: Melt beeswax. Place a small amount of beeswax in an aluminum can, place can in a small pot with about an inch of water. Melt over medium heat.

Tip: I bought an old pot at the thrift store for $.99 to devote to beeswax.

Tip: Crimp the aluminum can with your fingers to create a pouring spout.
Step 2: While beeswax is melting, make your acorn molds using the Play-Dough. Roll the Play-Dough into a short cylindrical shape and press the acorn down into the top of the Play-Dough, twisting a little as you push down. Carefully twist and pull acorn out of the mold.

Tip: If you're handy with tools or know somebody who is, tap the top of the acorn with a small screw to create a handle for pushing and pulling the acorn out of the mold.
Step 3: Pour melted beeswax into the Play-Dough mold.

Step 4: When beeswax dries (about ten minutes or so), remove the beeswax acorn from the mold.

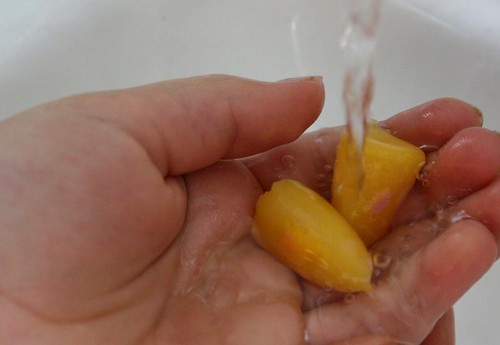
Step 5: Wash any remaining Play-Dough off of the beeswax acorn.

Step 6: Pop the acorn cap onto the beeswax acorn.

Tip: If you want to hang your acorn, poke a small hole into the acorn cap with a sharp nail before attaching the cap to the acorn. Make a loop with some string and pull the loop through the acorn cap using a small crochet hook.
Thank you Gardenmama for encouraging me to write up this tutorial. Sometimes I just need a little push to photograph and document my process.


I do love these! Perfect too.. a good friend sent me some acorns this fall and I have lots of wax from the bees! Thanks for sharing these Molly, what a great project.. and one that smells soo good!
ReplyDeleteLovely project!
ReplyDeleteI was wondering if maybe this would work with melted crayons, too? Could make a nice goodie for kids...
you're so good!! this is definitely on my list for next year. thanks!
ReplyDeleteThese are adorable...and one more reason why I need to keep bees.
ReplyDeletethese are so cool! thanks for sharing.
ReplyDeleteYou are incredibly creative! How did you even think of this!
ReplyDeleteI love it so very much, super tutorial too! xo
Oh, these are precious acorns!! Just too too cute. :0)
ReplyDeleteHave a lovely day,
Stephanie
Those little acrons are so sweet. I've been admiring everyone's beeswax adventures and really need to find some. Where do you get yours?
ReplyDeleteThese are beautiful! Thanks for the awesome tute!
ReplyDeleteBeautiful! Thanks for the great tutorial :)
ReplyDeleteAww, I love his! Beeswax is so much fun. Thanks tons for the how-to, I'll be linking.
ReplyDeleteChris saw this come in my inbox on RSS feed and came and got me - he thought it was that cool - which they are! Thanks for taking the time to share the tutorial. I will definitely have to make these someday. Someone asked about it working with crayons? Wouldn't that be fabulous?
ReplyDeleteCouple of days before Christmas and I seem to be taking on more handmade gift projects. Nuts. Midnight and the sewing machine is running and the stitch ripper is out. Silly - but oh so Christmas.
Wouldn't be Christmas unless I was peeling tape from the bottoms of my socks before bed. Happy Holidays Molly - have a great one!
I love this and can't wait to try it! Great idea and so easy to adapt to other things.
ReplyDeleteAnnie
these are adorable!! i happen to bee obsessed with beeswax at the moment. i love to have another fun project to try out!
ReplyDeleteI wish I had more oak trees here in the Pacific Northwest. I'm going to have to beg my daughter to collect acorns in the fall for me. Love the project.
ReplyDeleteWhat a wonderful project! I love the naturalness of the beeswax and the acorn cap. Thanks for the tutorial!
ReplyDeleteLinda